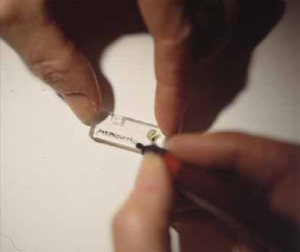
Sample placement


EasySections have three wells (see diagram 1). labels1 Wells A and B are for paint samples; well C should be used for labelling in conjunction with well B. Well A is for use with a polishing wheel and produces a cross section which is thin enough for use with microscopes which have a short distance between objective and stage (biological microscopes). Well B is for cutting by hand but can also be used with a polishing wheel. Samples should be placed face up in the chosen well.

Sample labelling


A Rapidograph or other similar very fine indelible pen should be used. Labels can be written in well C directly on the cube or on a paper label. If using well A for samples, a paper label should be placed upside down in well C or alternatively, the label can be written on the face of the cube below well A.

Preparation of embedding resin


One drop of component B (dropper bottle) to 1ml of component A. In practice, mixing 2-3 ml at a time is the optimum amount. Stir carefully and leave to stand briefly to allow any air bubbles to rise. Further bubbles which form while putting the resin into the well should also rise by allowing the EasySection to stand. Use resin within 20 minutes. Resin must be at room temperature before mixing. Resin has a minimum shelf life of 1 year if stored in its container in dark below 20°C. Catalyst should be stored in dark below 25°C. NB The material safety data sheets, available on this site as printable PDF files (MATERIAL SAFETY DATA SHEET A, MATERIAL SAFETY DATA SHEET B) must be read before carrying out this procedure. In order to read these files you will need to have the Adobe Acrobat program installed.

Adding embedding resin


Once the sample has been placed in one of the wells, add the resin by drops using a fine stick (satay stick for example). It is best to overfill the well as the resin will shrink on hardening (approx. 20%). Adjust the sample’s position where necessary using a very fine needle (microneedle provided with EasySections kit), or any other suitable probe. Cover the label with embedding resin to protect it. Beakers can be reused by leaving a stick in them. This way, unused resin can be pulled out once hard. A sharp tap to the bottom of the beaker will also cause the hardened resin to fall out.

Curing resin


At room temperature (15°-20°C) samples will be hard enough to handle after 1.5 hours, and will be ready for polishing after 18 hours. Curing time can be significantly reduced (to about 5-7 hours) by warming, eg by placing under a tungsten bulb (circa 40°C).

Cutting section


Hand cutting, using well B; Place the EasySection in the pliers (or a small vice) so as to conceal the sample or leave it slightly exposed. The label should also be protected within the pliers or vice. Hold the pliers flat on a table with the head protruding over the edge. Use a fine hacksaw to cut the EasySection lenghtwise using the pliers’ face as a guide. If the sample is not yet exposed after sawing, any excess can be removed using wet and dry paper (see diagram 2). Mechanical cutting, using well A; A polishing wheel can be used to expose samples when using well A. Grind the large flat side of the EasySection until the sample is just exposed (see diagram 3). Whichever method you use, always remember that it is easier to remove more at a later stage than to replace what has already been removed!